Activating the extension
There are a few steps that needs to be done after installing Acceptance Criterias. Most of the features in this extension is hidden behind feature toggles. This is done to prevent a lot of noise in organizations with a lot of projects. This way each individual project can decide if they wish to activate the extension.
Activating the work hub and admin hub
Activation of this extension must be done by a Project or Collection administrator
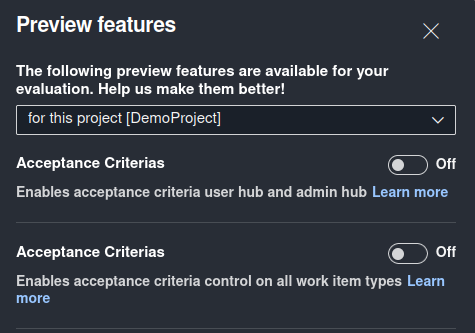
This extension must be activated under the "Preview Features" menu of Azure DevOps. See "Enable features for your use" for how to access the menu.
To activate the work hub that gives an overview over all criterias, follow these steps:
After installing the extension a Project or Organization administrator will need to toggle the feature flag to On. This feature flag is scoped to individual projects, that means you need to be inside a project for the feature flag to appear. The url should look something like https://dev.azure.com/ORGANIZATION/PROJECT
When you open the modal with all the feature flags the dropdown should have three options
for me [Your name]for this project [Project Name](This is the one you should select)for this organization [Organization Name]
Toggle the feature Acceptance Criterias - Hubs to On.
Adding the control to work items
The work item control can be added in two different ways. Either as a global work item page, or added to individual work item types.
Activate for all work item types
This option will add the acceptance criteria page to all work item types in the project and is the quickest way to get up and running.
Follow the same steps as the section above where you activated the hubs, but toggle the feature Acceptance Criterias - Work item control to On.
You can hide the page on the work item types where you do not wish to use it, but this requires updating each work item type.
Add to a single work item type
To use this option, your project must be using an inherited process that can be customized.
The acceptance criteria control is also available as a Custom Work Item Control and can be added to individual work item types. You will still see the work item page provided by the extension, but it will not be visible on the actual work item.
For the best experience, the control should be added on a dedicated page on the work item. Follow these steps.
Open the work item and add a new page (We'll use
User Storyhere).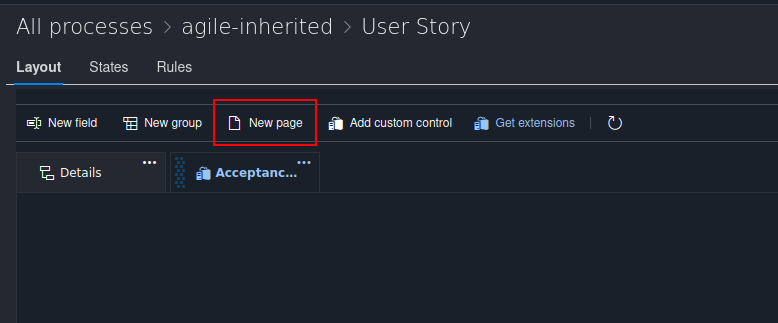
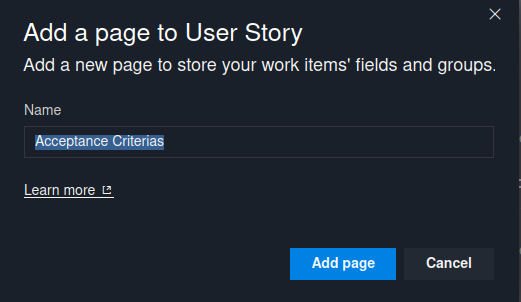
If you receive the following message when trying to save the page with the title
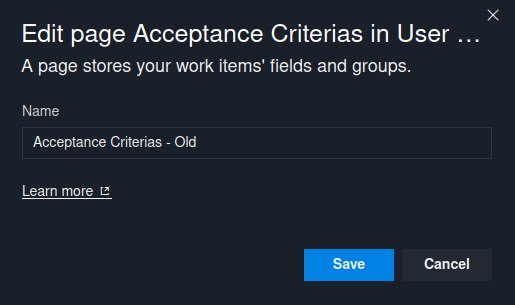
Acceptance Criteriasyou will need to rename the EXISTING page on the work item that is provided by the extension.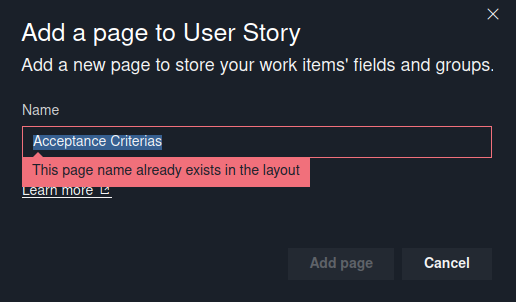
Now that you have an empty page. Add the control
Work Item Acceptance Criterias(selectAdd custom control) to your newly added page.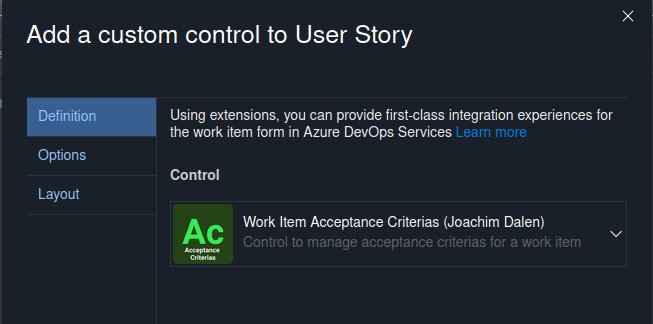
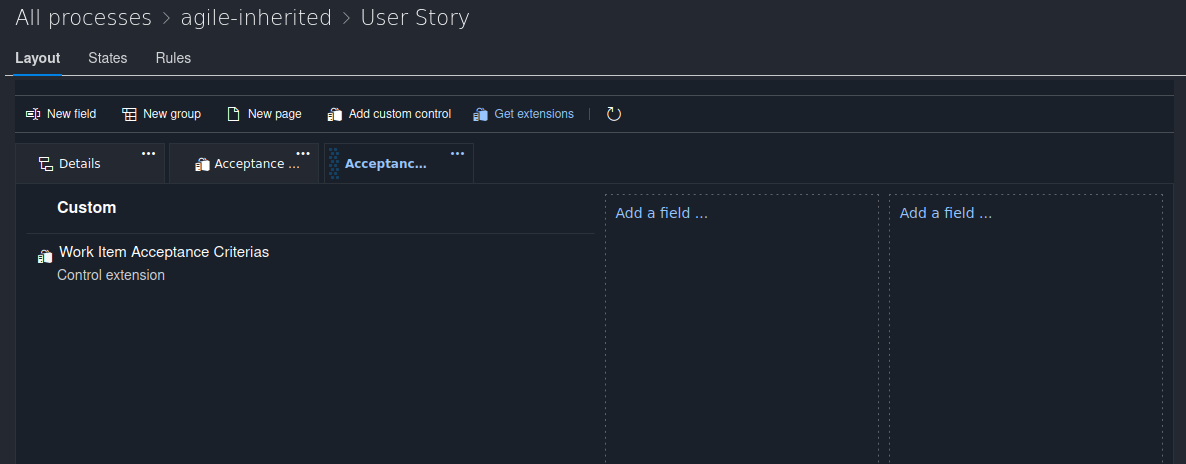
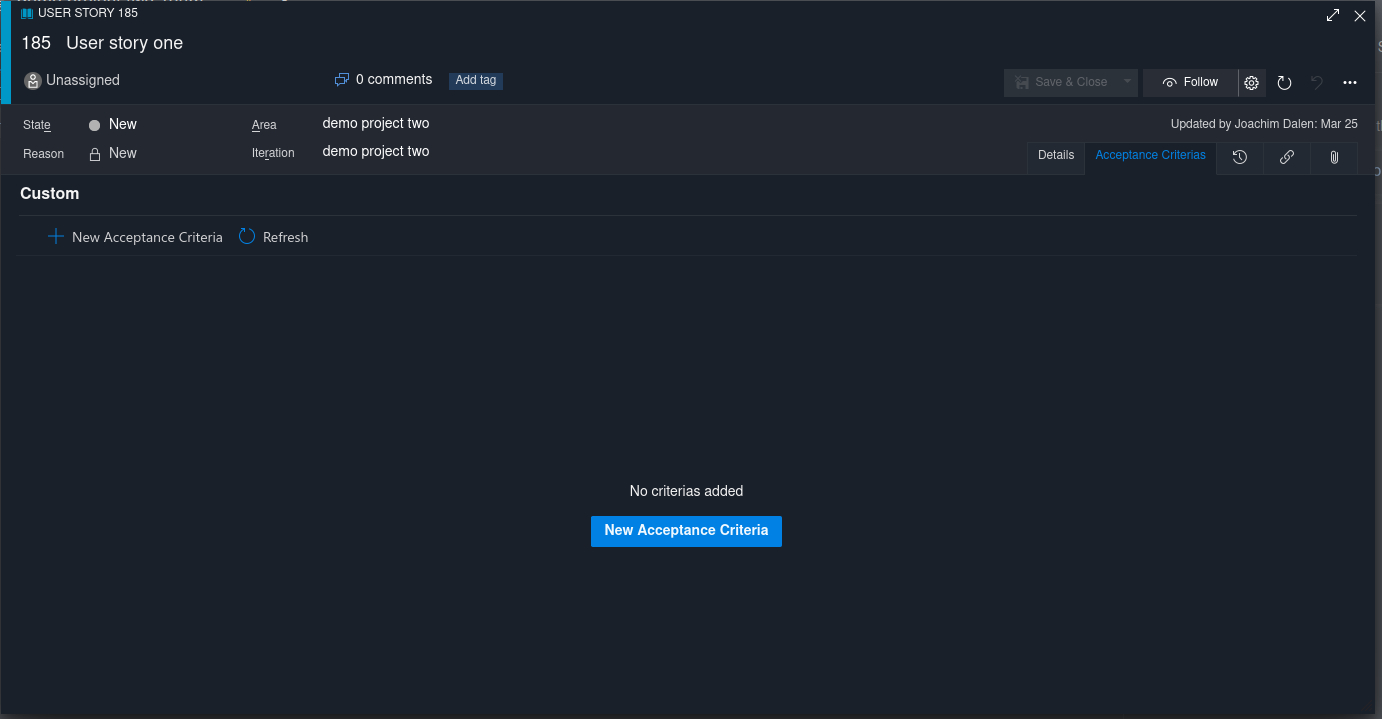
Now you should see the new page and control on your user stories.